Making This Paris Lantern Glow
- At April 04, 2019
- By katzp
- In Behind The Scenes, Process, Recent Work
 0
0
 I’ve really been enjoying working with the members of the Artists’ Workshop group this year.
One of the best parts of our weekly sessions is learning more about how other artists approach their work.
I have long been intrigued by the way that colleague, Val Miles, incorporates foil work into her bird images. You can see more of Val’s work by checking out ‘Val Miles Mixed Media’ on Facebook.
Val graciously offered to show me how she handles this process, and led me through the steps involved in adding foil to one of my watercolor lanterns.
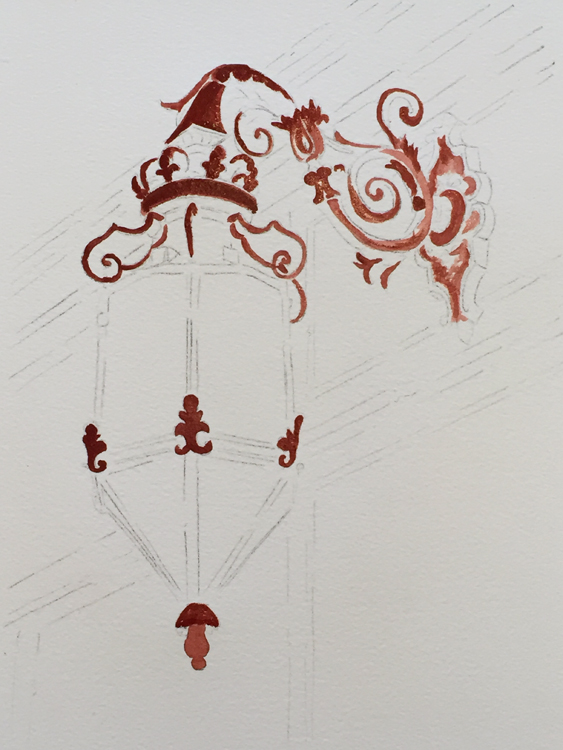
Val uses a multi step process that involves: sketching your image, deciding where you would like to add foil, adding a background color in those areas, applying an adhesive, and then burnishing the foil into place.
Once the foil is adhered, you complete the rest of the painting in the normal way. In my case, this involved ink and watercolor.
Here are a few pics that show how the process unfolded on this Paris Lantern. You can have a first hand, up close and personal look at the end result at our Artists Workshop Spring Show & Sale, where this beauty will be putting in an appearance.
The show and sale takes place at Grace Westminster Church, 505-10thStreet East in Saskatoon. Friday, April 13 (7 – 9 pm). Saturday, April 14 (10 am – 5pm). Sunday, April 15 (Noon to 4 pm).
Thanks, again, Val for your patience and for sharing your how-to know-how with me!